Setting Up Your PSA Integration
audIT makes syncing customers with your existing PSAs a breeze. Knowing where to find all the keys and passwords for a first-time setup is a little trickier, so we're here to walk you through.
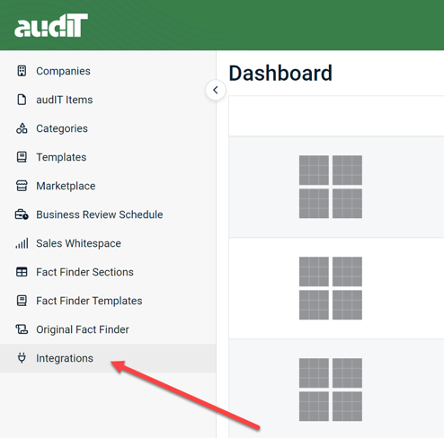
Integration settings are found left navigation sidebar. Once there, use the following instructions to set them up.
NOTE The PSA Integration allows you to create new companies using the integration. You will not see new companies in the "integrated companies" list until you manually create them. Since audIT is licensed by number of companies, it does not automatically import your entire list. Synchronizing your connection can be done manually if you have added new companies in the PSA.
ConnectWise Manage
Creating an API member
- Log in to your ConnectWise Manage account.
- Using the navigation on the left-hand side of your screen, click System, then Members.
- Navigate to the API Members tab and click (+) to create a new member.
- Enter the following:
- Member ID: audit
- Member Name: audIT API
- Role ID: Admin (or whatever your top role is named)
- Level: Corporate (or whatever your level 1 is named)
- Location, Business Unit, and Default Territory can be any value
Creating an API key
- Next, navigate to the API Keys tab, and click (+) to add a new key.
- Fill out the Description field, which can just be "audIT". Note the Public Key and Private Key displayed.
Finish setting up audIT
- Now, go back to audIT and enter the following information:
- Base URL: this will be the URL you access to log in to your ConnectWise account. It'll likely be one of the following (make sure you include the https:// prefix):
- Public Key and Private Key: enter the information you copied just above.
- Company ID: this will be the same company ID you use to log in to your account.
- Base URL: this will be the URL you access to log in to your ConnectWise account. It'll likely be one of the following (make sure you include the https:// prefix):
- Enter the information you just collected into audIT and tap Save. We'll automatically test the connection and let you know if anything went wrong.
Autotask
- Log in to your Autotask PSA account at autotask.net.
- Using the three-bar menu at the top of the screen, select Admin, then Resources (Users).
- Mouse over the down arrow next to New and click New API User.
- Enter the following information:
- First Name: audIT
- Last Name: API
- Email: help@auditforit.com
- Security Level: API User (system)
- Click Generate Key for both the Username (Key) and Password (Secret) fields and note both.
- Under API Tracking Identifier, choose Custom (Internal Integration), enter "audIT" for Internal Integration Name, and note the tracking identifier just below.
- Tap Save & Close, and enter the information you just collected into audIT.
- Once you've entered your information into audIT, tap Save. We'll let you know if everything checks out.
Next steps
Now that your integration is set up, you'll be able to add new audITees from integrations or link existing audITees to records already in your PSA.
Troubleshooting
My agreements aren't appearing.
Only active (check your start and end dates!) and recurring agreements are considered for MRR computation. For Autotask, these contracts are specifically called "Recurring Service Contracts." When troubleshooting, manually re-syncing an audITee will immediately re-import your agreements.
My company won't appear inside audIT.
If you're having trouble getting a company to appear inside audIT, step through the following:
- Make sure your company has at least one contact record. An audITee requires one primary contact method.
- If you're using ConnectWise, make sure the company status is set to Active. You can change this from your Company Finance or Company Mass Maintenance views. Read more.
- Navigate to Admin > Integrations, and click Sync Now under the integration you're troubleshooting.
My MRR isn't accurate.
audIT prorates and averages out your agreements to estimate an accurate MRR, but a small deviation is expected. If your MRR is significantly off from what you expect after a manual sync, let us know.
When I go to add an integration, the inputs are disabled.
You must be an audIT admin to manage integrations. You'll need to contact your account administrator.
Kaseya BMS
- In the audit app, click Integrations.

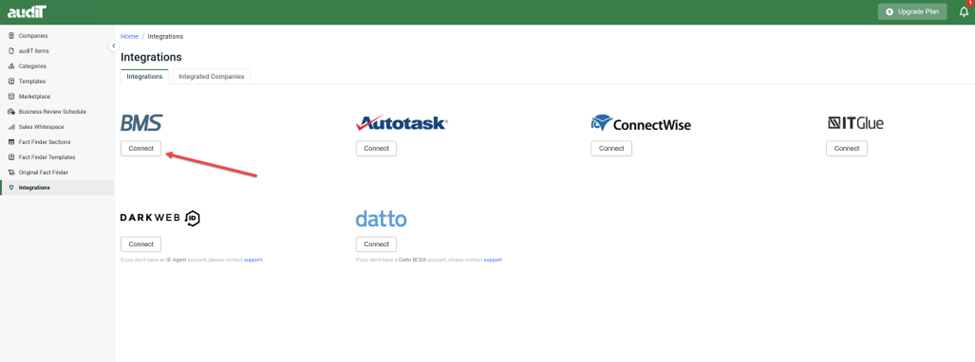
- Click Connect underneath the BMS logo.
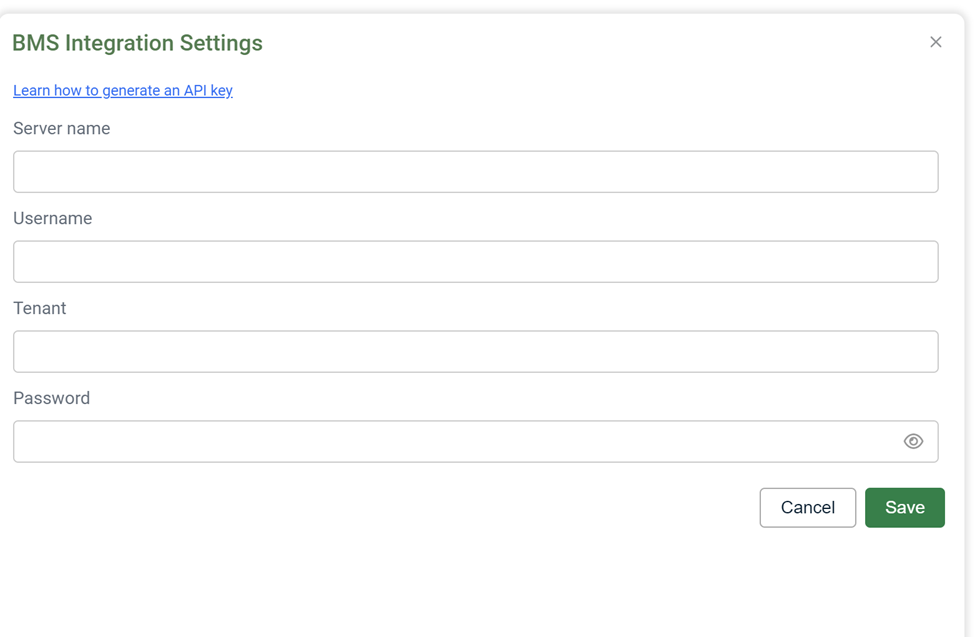
- Enter the Integration Settings.

- Server Name: https://bms.kaseya.com
- Username: The username you use to log into BMS
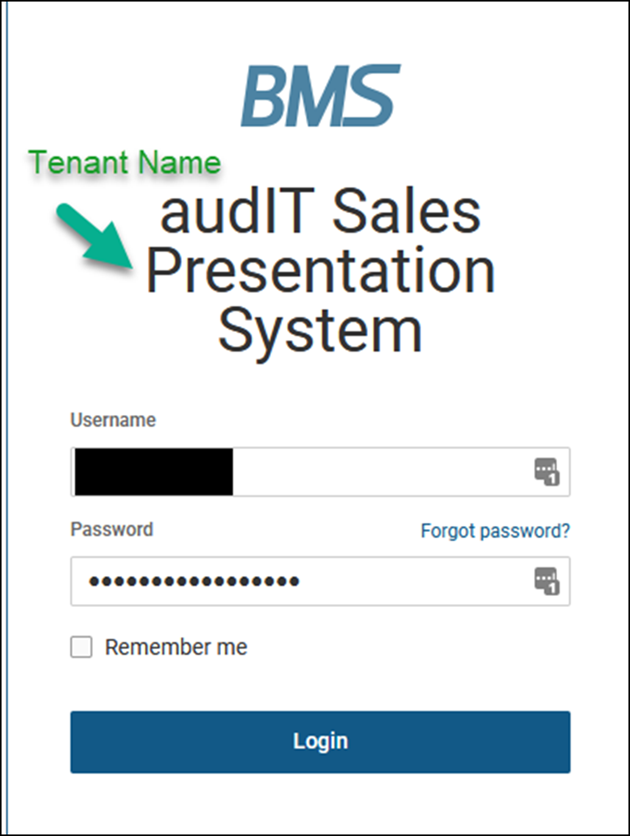
- Tenant: Your tenant name that is presented on the login screen (see screenshot below)
- Password: The password you use to log into BMS

- This will complete the integration set up. You can perform a sync at any time to be able to import recent prospects or customers.